We create a chatbot without coding with the help of Watson Assistant

What to do with our new IBM Cloud account if we don't feel like programming? We can build our own assistant who can help us contact our clients, determine what topic we are talking about and answer various questions automatically.
Just click
We will build a basic assistant based on Watson Assistant available in IBM Cloud without programming or a line of code. We can immediately use such an assistant by sharing it via Facebook Messenger, Slack, and even placing it on our website.
For this we will do it completely free after creating a Light account (which we did in the previous text in this series).
Most importantly, the assistant built in this way will have two very important features:
First of all, we will be able to teach new things - if we come across a phrase that we did not handle during its configuration, we can easily improve it.
Secondly, we can add functions to it using any programming language. We are also able to add connectors to our company's databases so that they can use them, answering customer questions (e.g. could provide shipment status downloaded from our database based on the order number provided by the customer).
In other words - the first steps made by "clicking" functions do not close us in a limited form. We are able to expand the possibilities of our chatbot at any time.
A matter of language
As is usually the case with natural language recognition services, most of the "out of the box" functions will be obtained for English. We will also base our bot on this language for simplicity.
This does not mean, however, that we are not able to adapt the Watson Assistant based assistant to the Polish language - however, this requires adding your own rules based on keywords. This is possible - an example of such an assistant who speaks Polish can be found here, and its source code and installation description is on GitHub .
In this example, I would like to show you how to use ready-made predefined rules and intentions, so it will be based on English.
We create an assistant
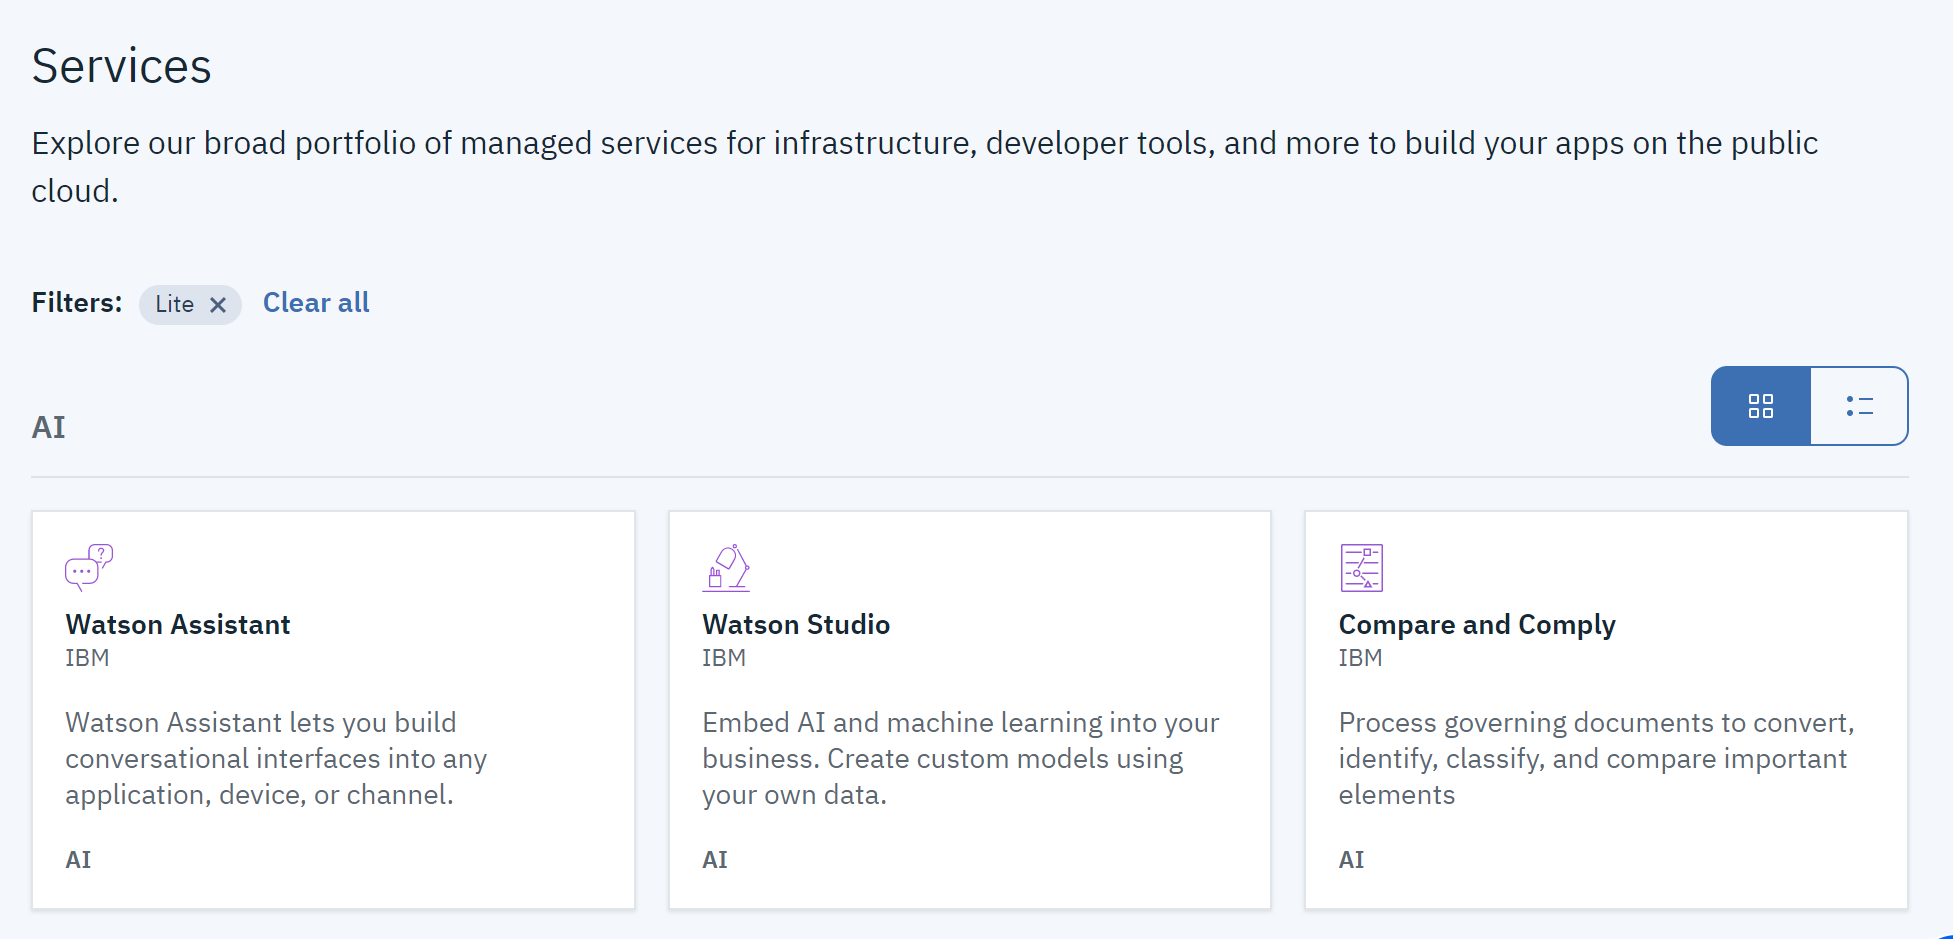
We start by creating a resource - select the "AI" services on the left side of the panel - that is, related to artificial intelligence. On the right we will see many services, but we are interested in Watson Assistant.
After clicking the created assistant, we will receive information that will allow us to connect to this service from our application in the future. Click on Launch Watson Assistant.
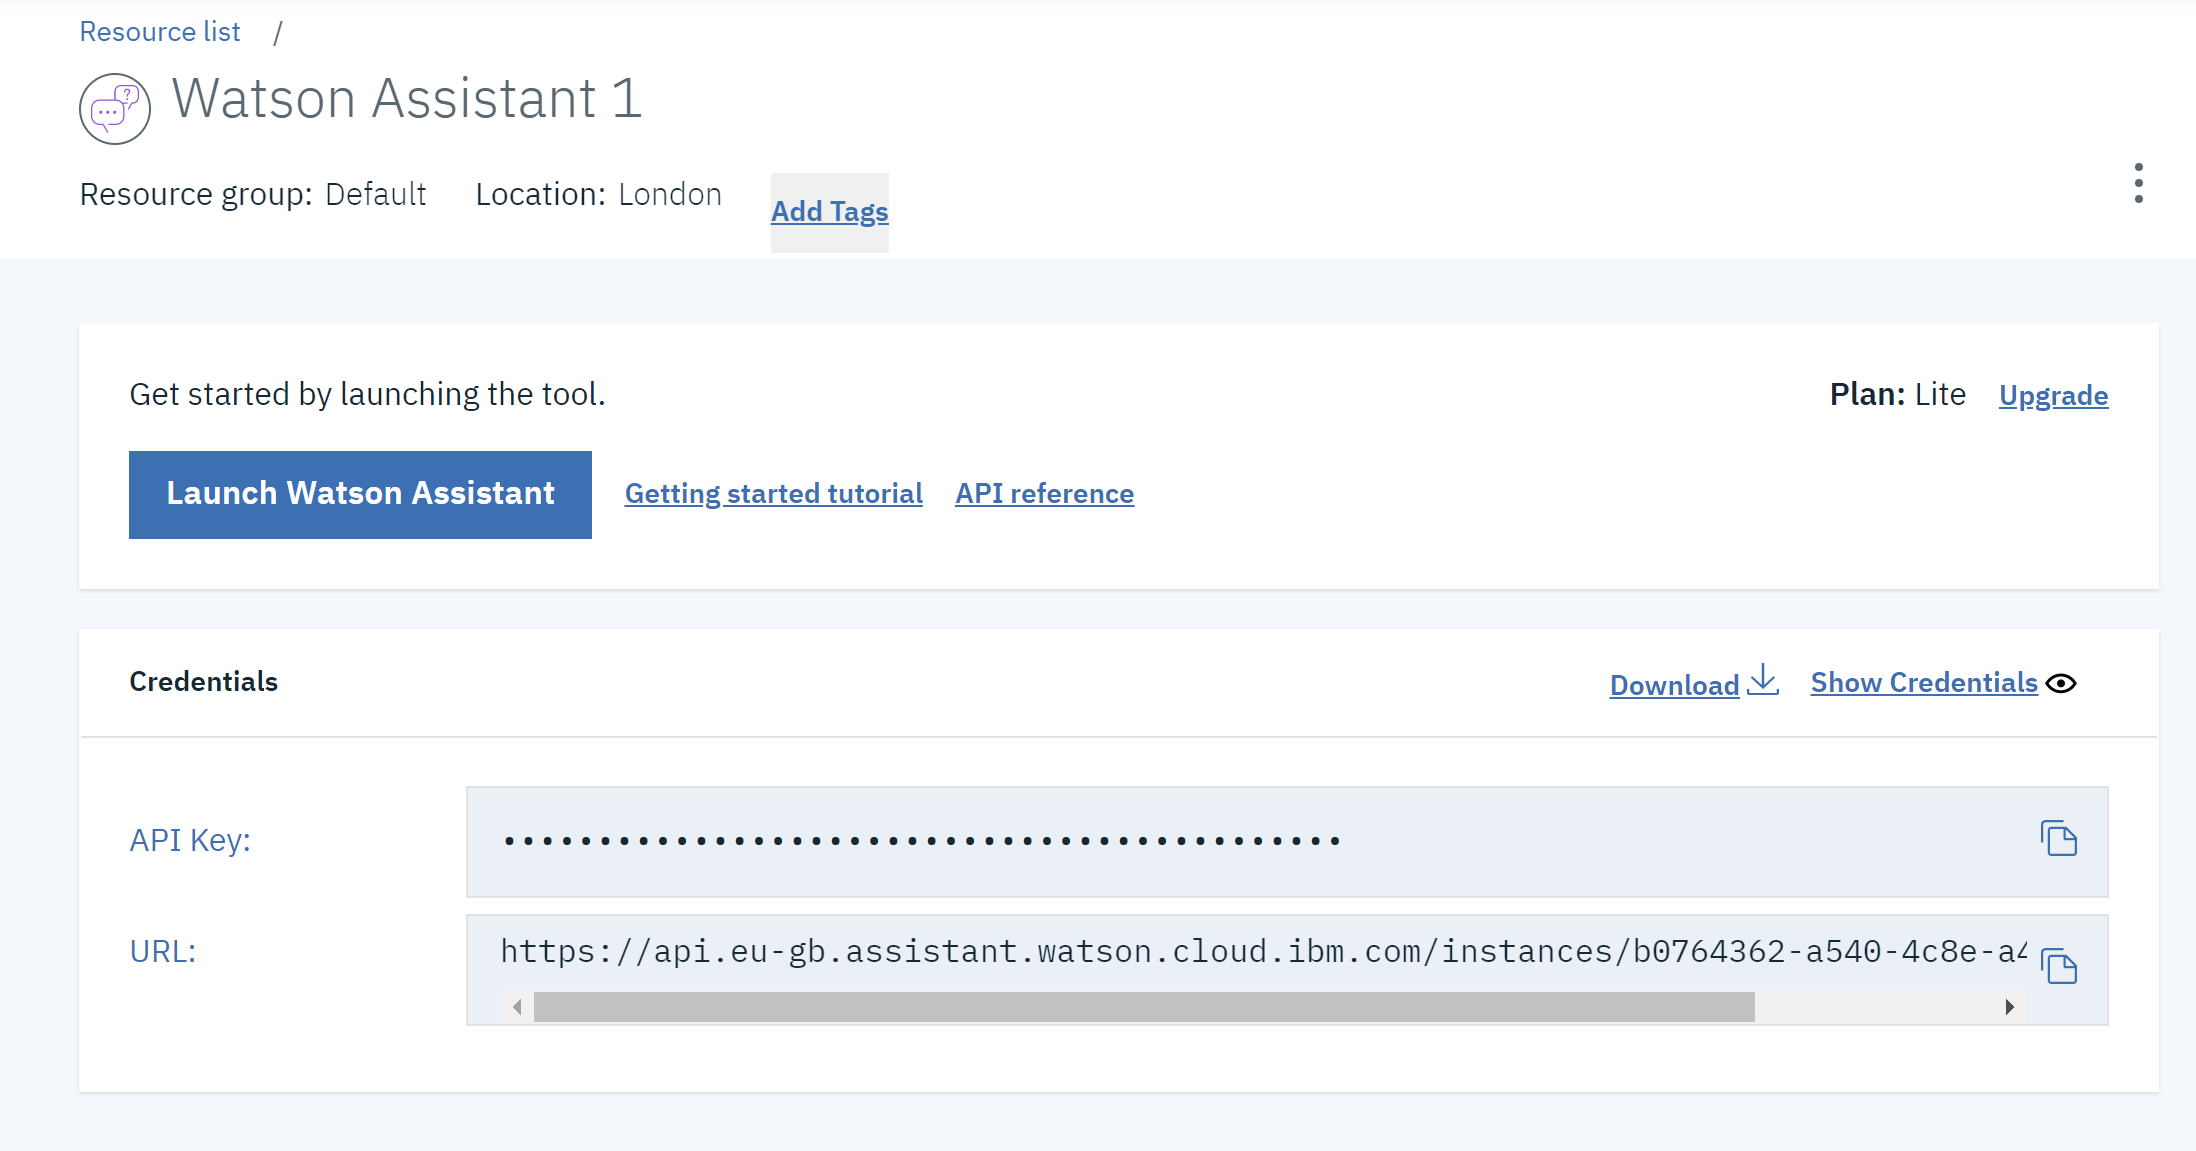
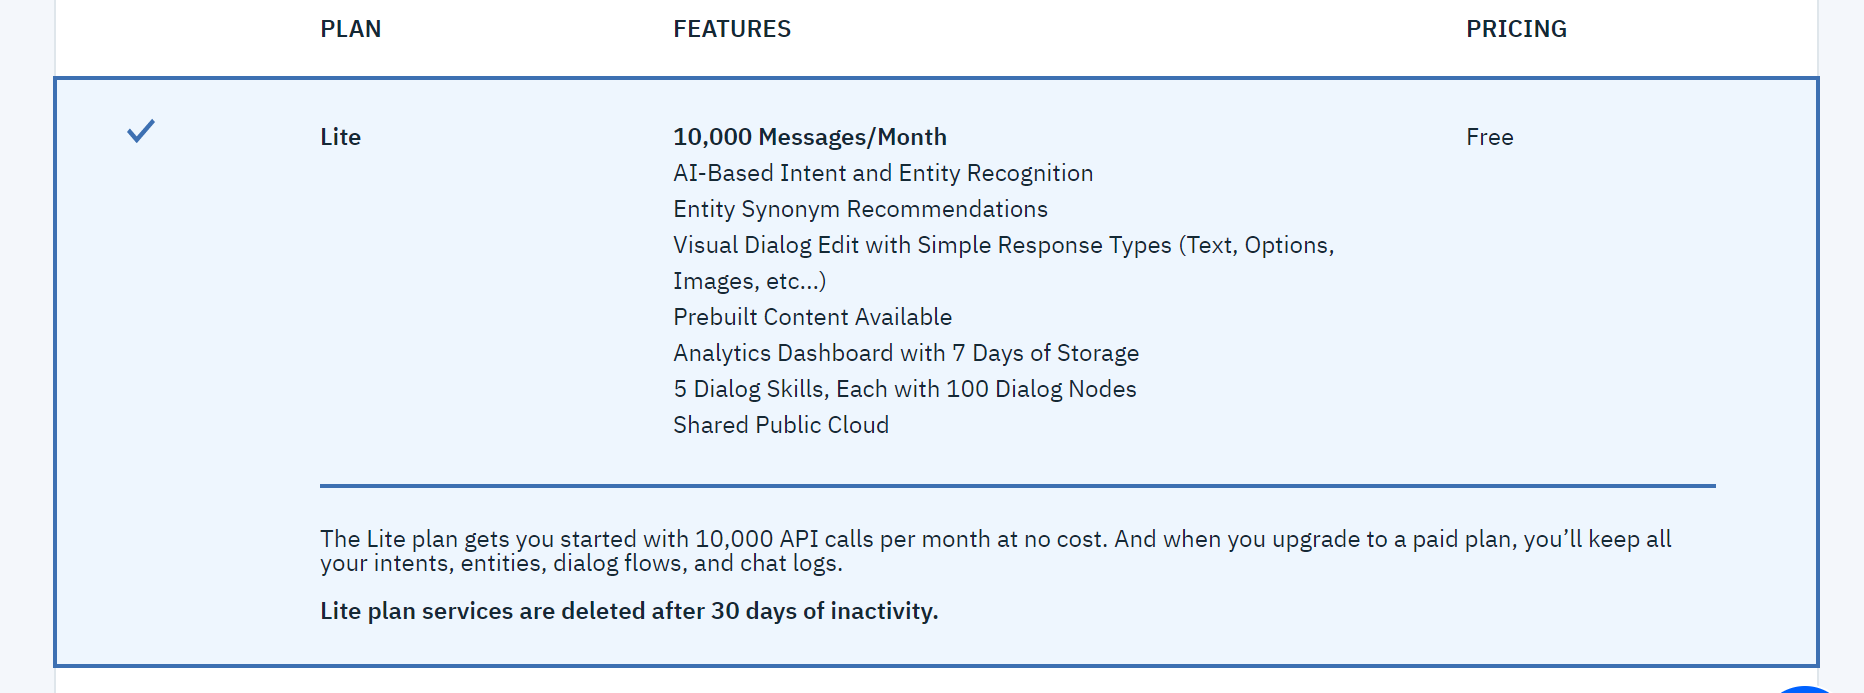
Then we have the opportunity to choose the right plan. We choose Lite to be sure that we will use only free functions.
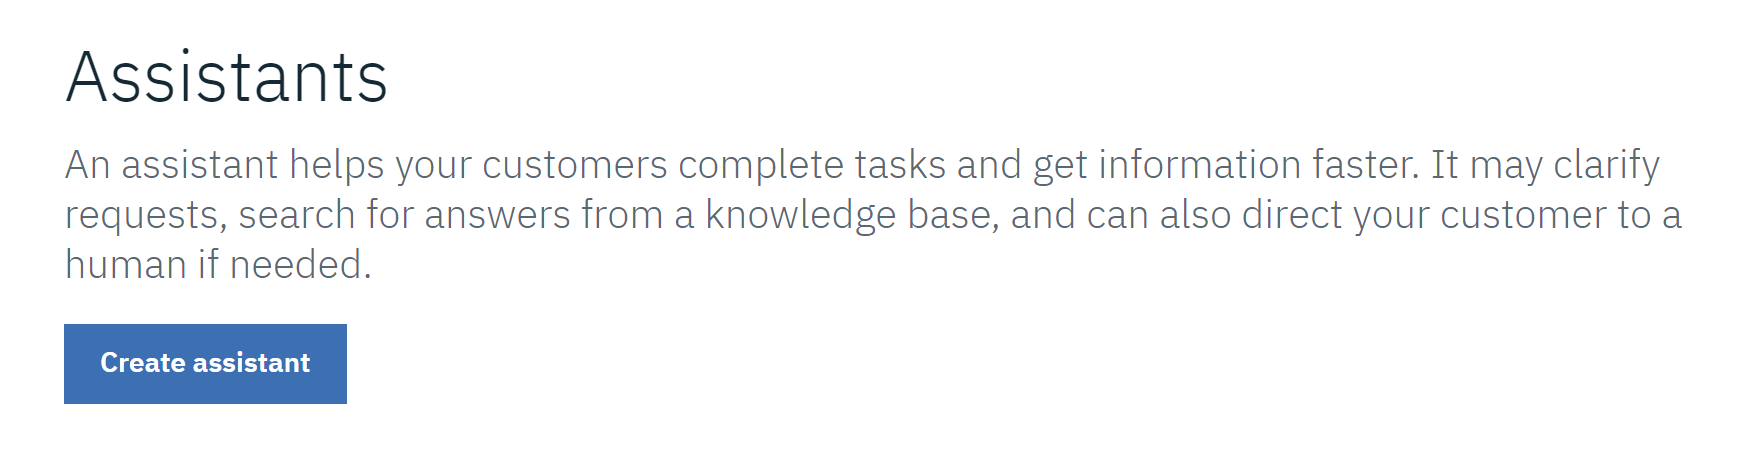
Here we can create a specific instance of our assistant. We can have more than one instance of assistants who will, for example, specialize in other issues, or work in various departments.
On the left we can see that in addition to assistants, we can also create Skill or skill, which we can equip one or more assistant. It is here that we can predict different ways of interacting with interlocutors.
By default we will have created the first assistant with the skill connected.
And this skill will now be edited by adding conversation topics to it.
After clicking on the skill (which will probably be called My first skill) a simple web editor will appear.
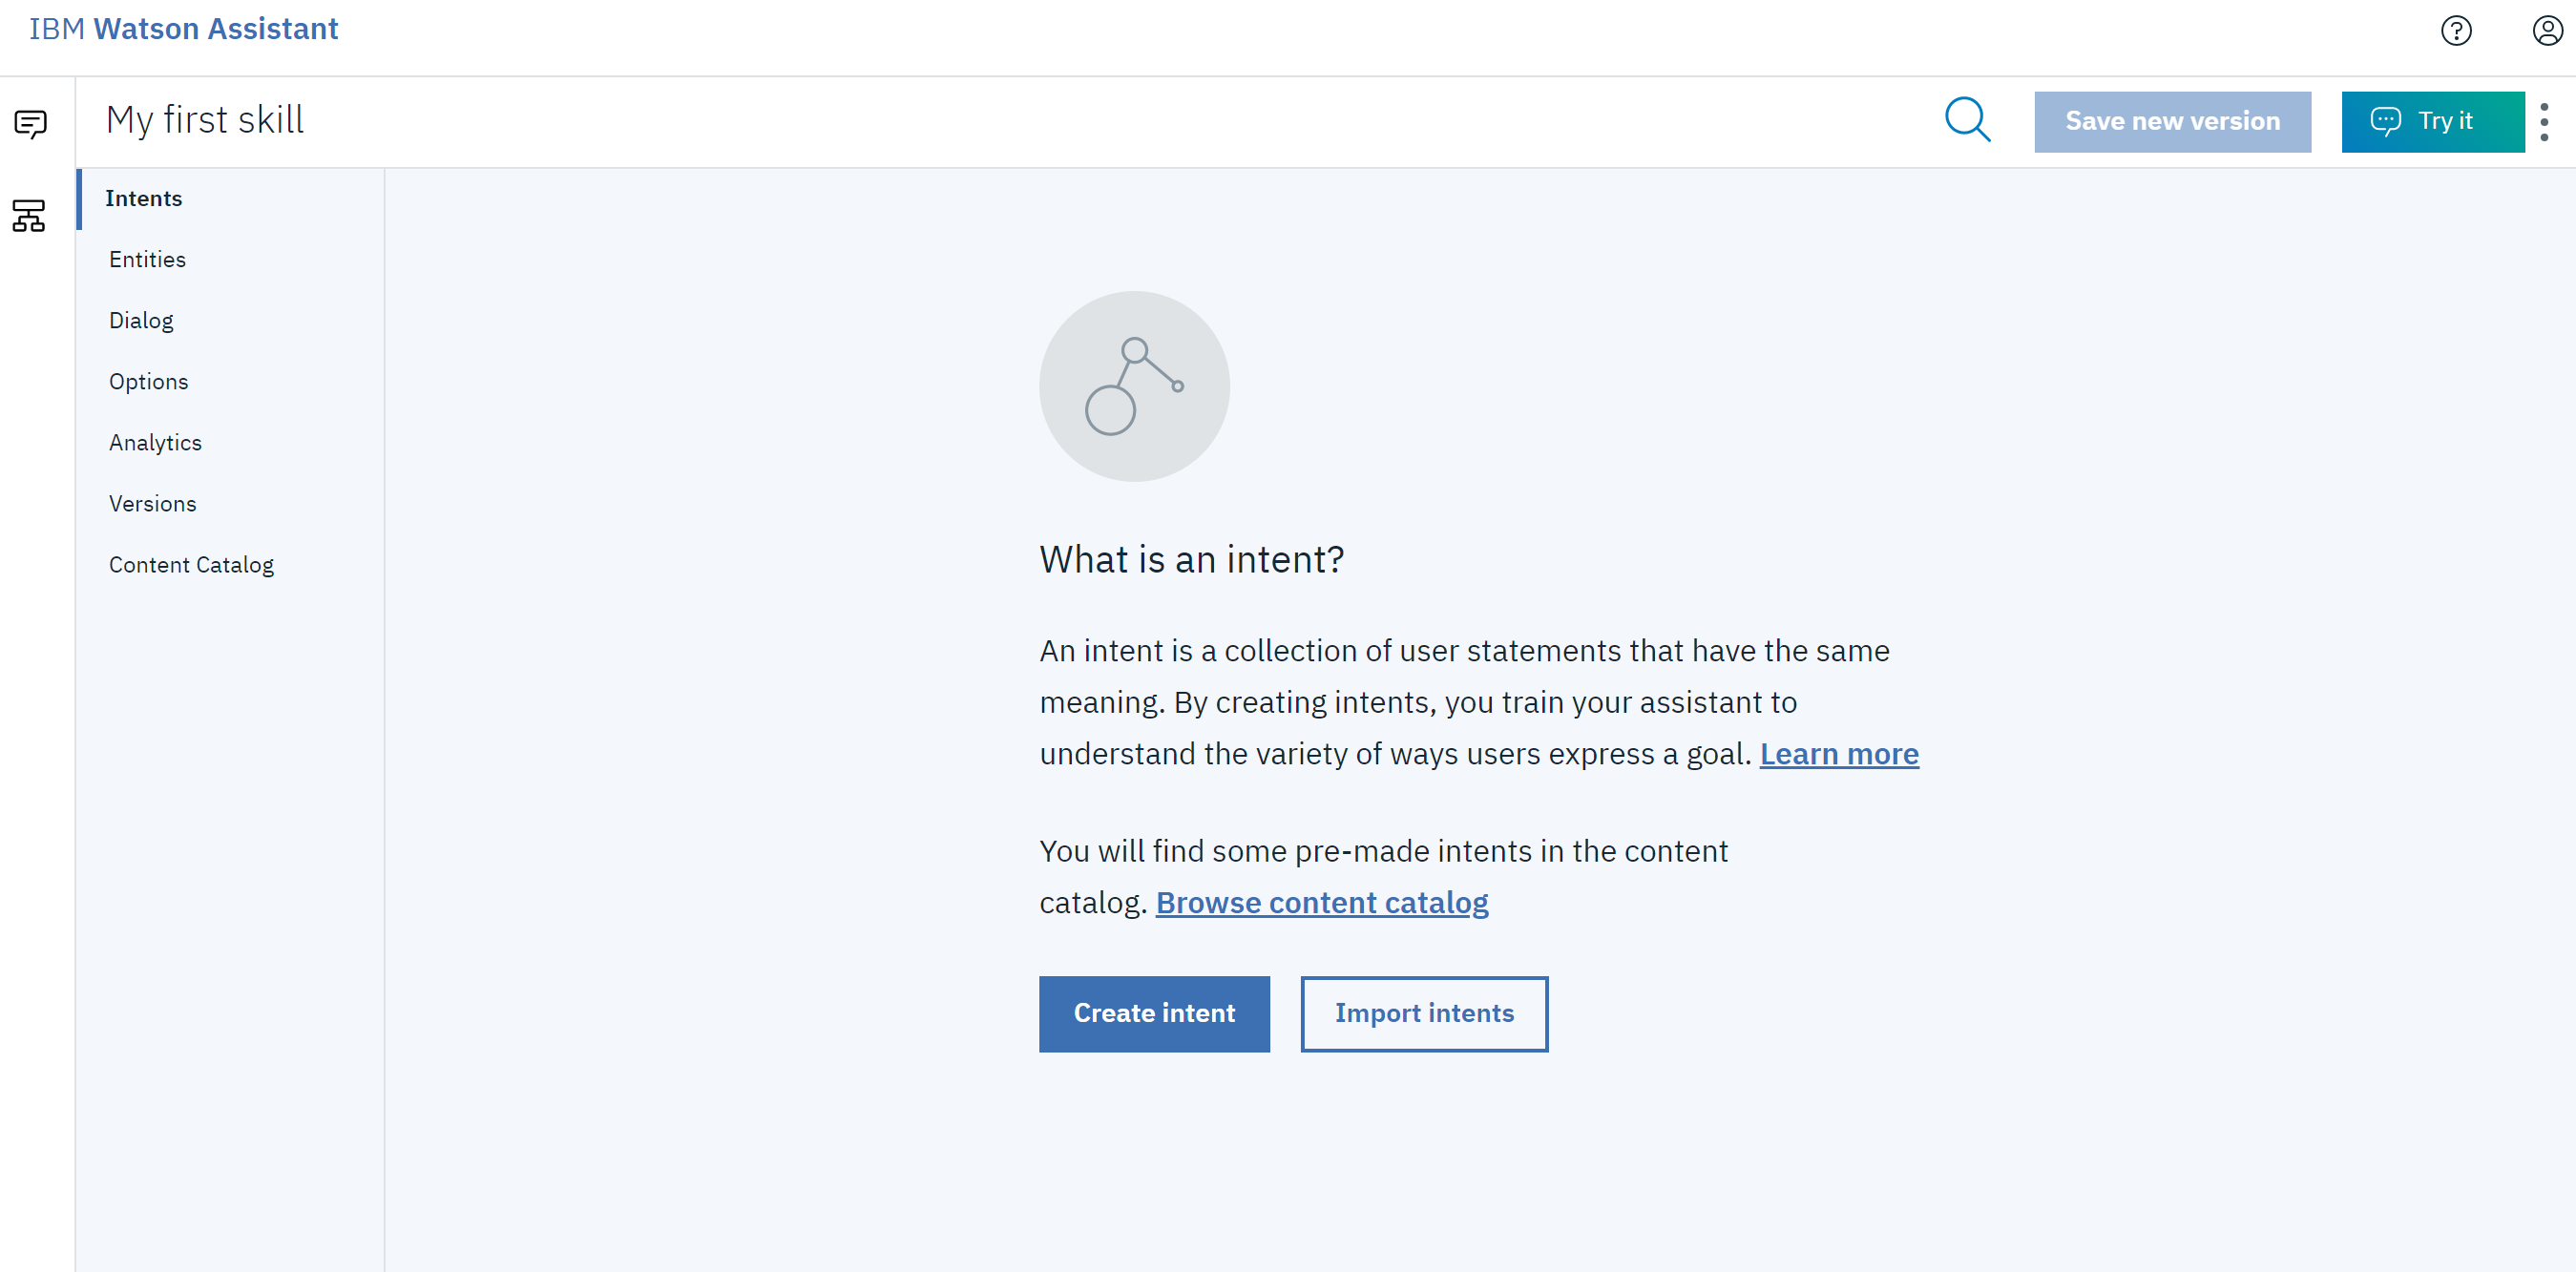
We can create here the so-called intent - this is the topic of conversation, sometimes called the intention in Polish - because here we want to determine what the user has the intention when talking to us.
On the left we see one of the options: Content catalog. This is a directory of ready-made content. Let's have a look there.
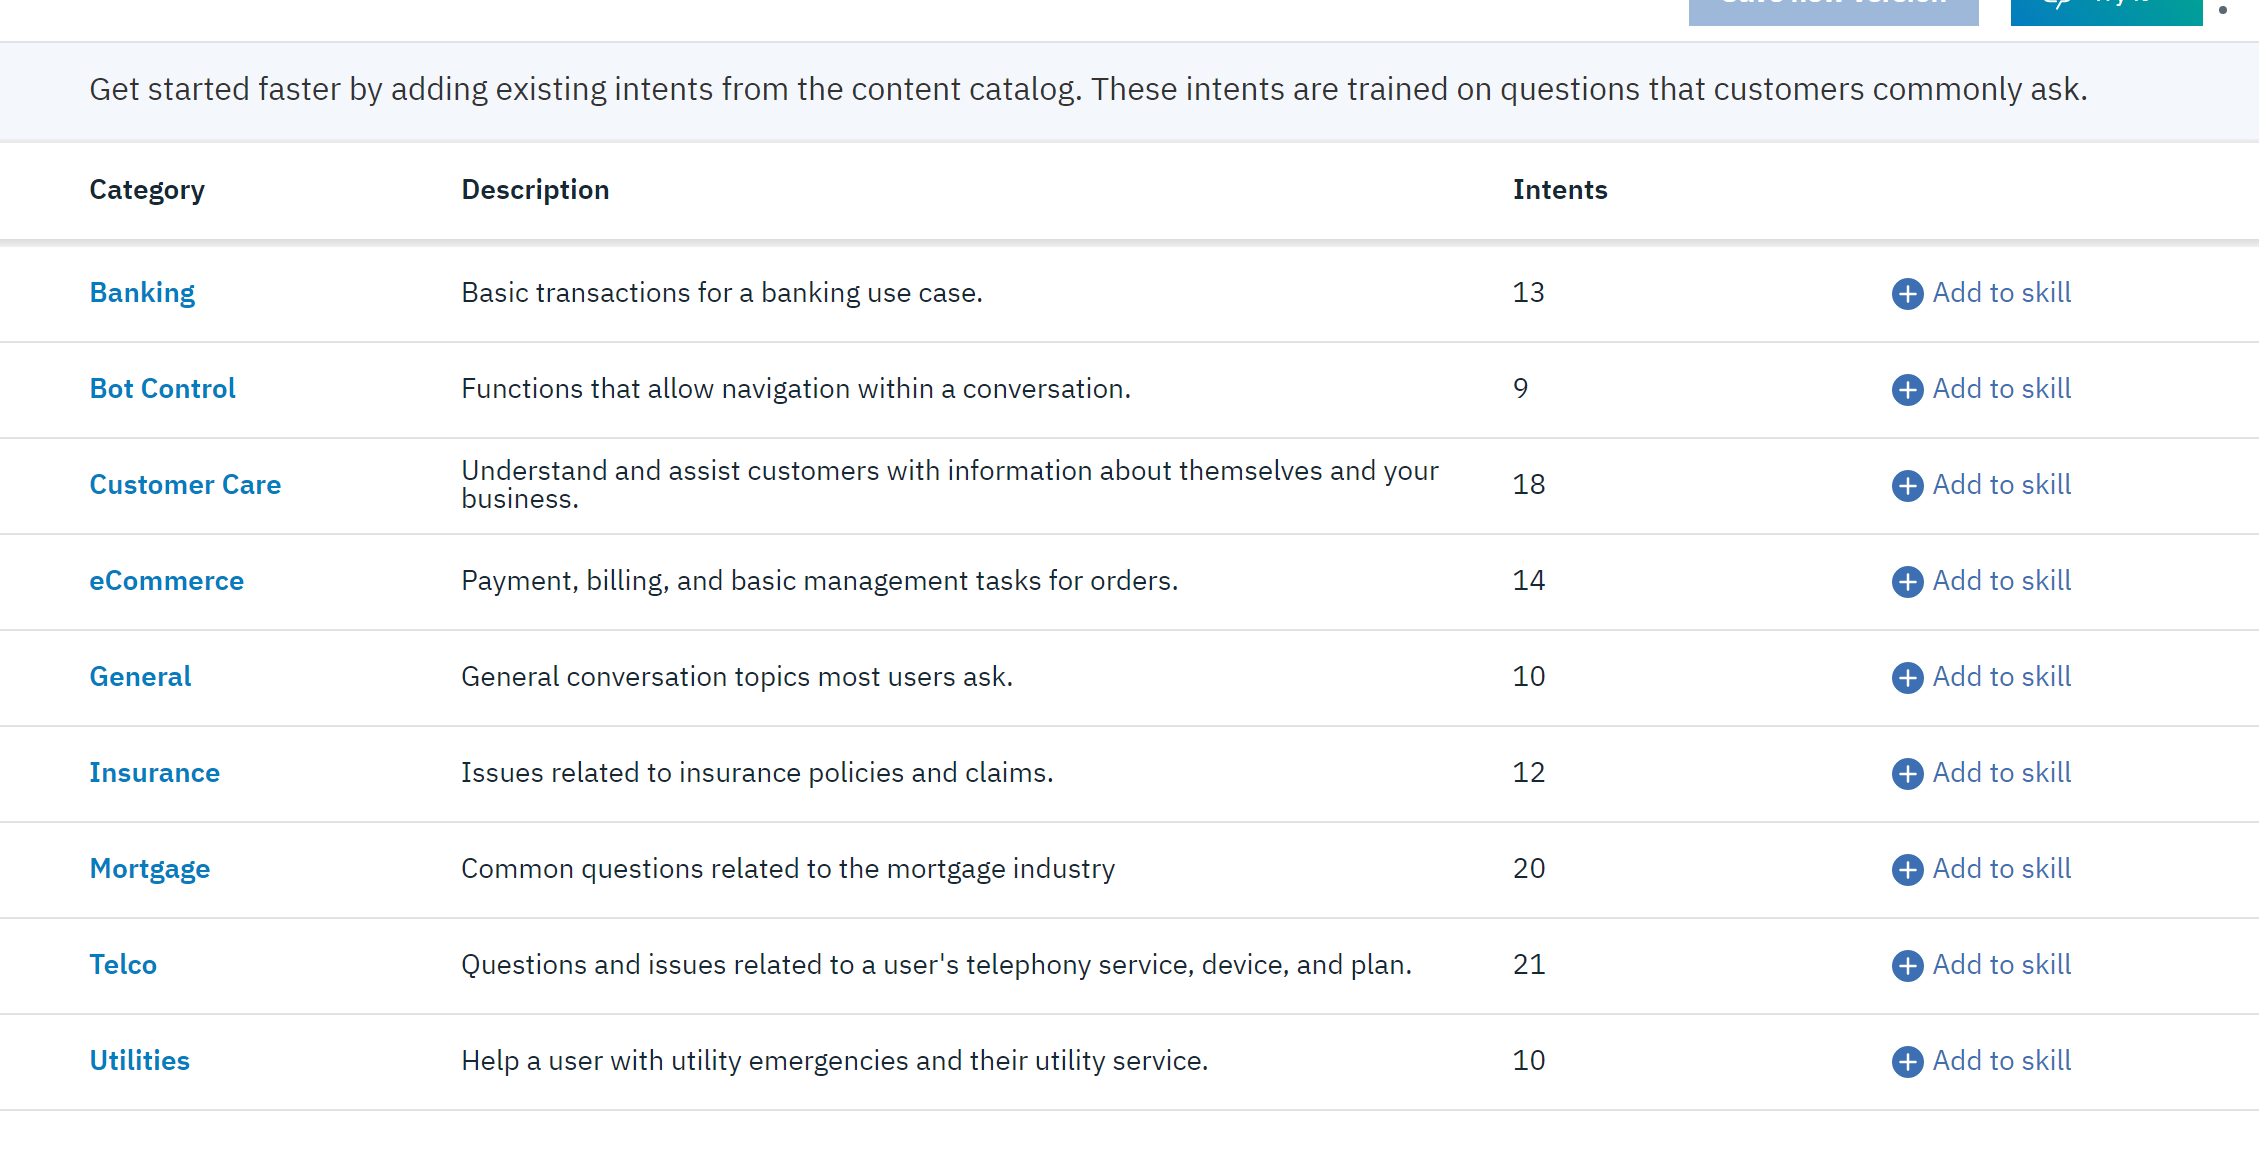
As we can see, IBM has prepared for us the entire large catalog with ready intentions divided by subject. The categories we see here include insurance, banking and telecommunications.
Select the General category by clicking on "Add to skill". The General category contains basic conversational skills: such as greetings, farewells, questions about the functions of the assistant and handling of the question whether we can talk to a live assistant. This is a common function: if the user feels that he is "not getting along" with the robot, he can signal a desire to connect with a human.
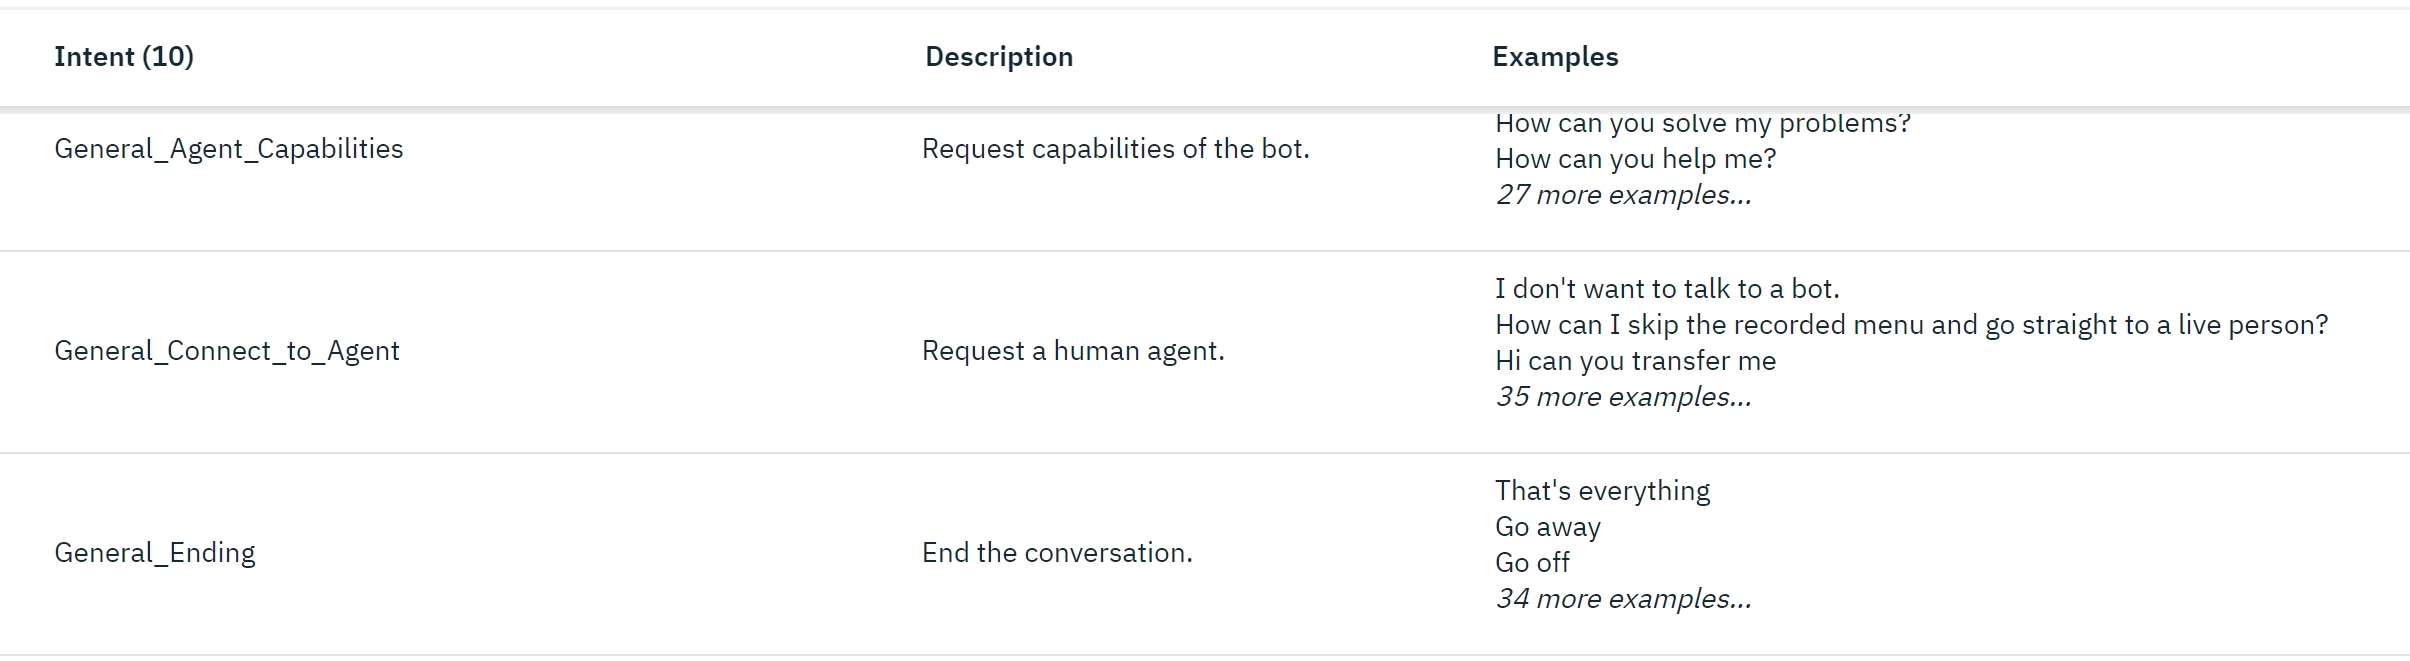
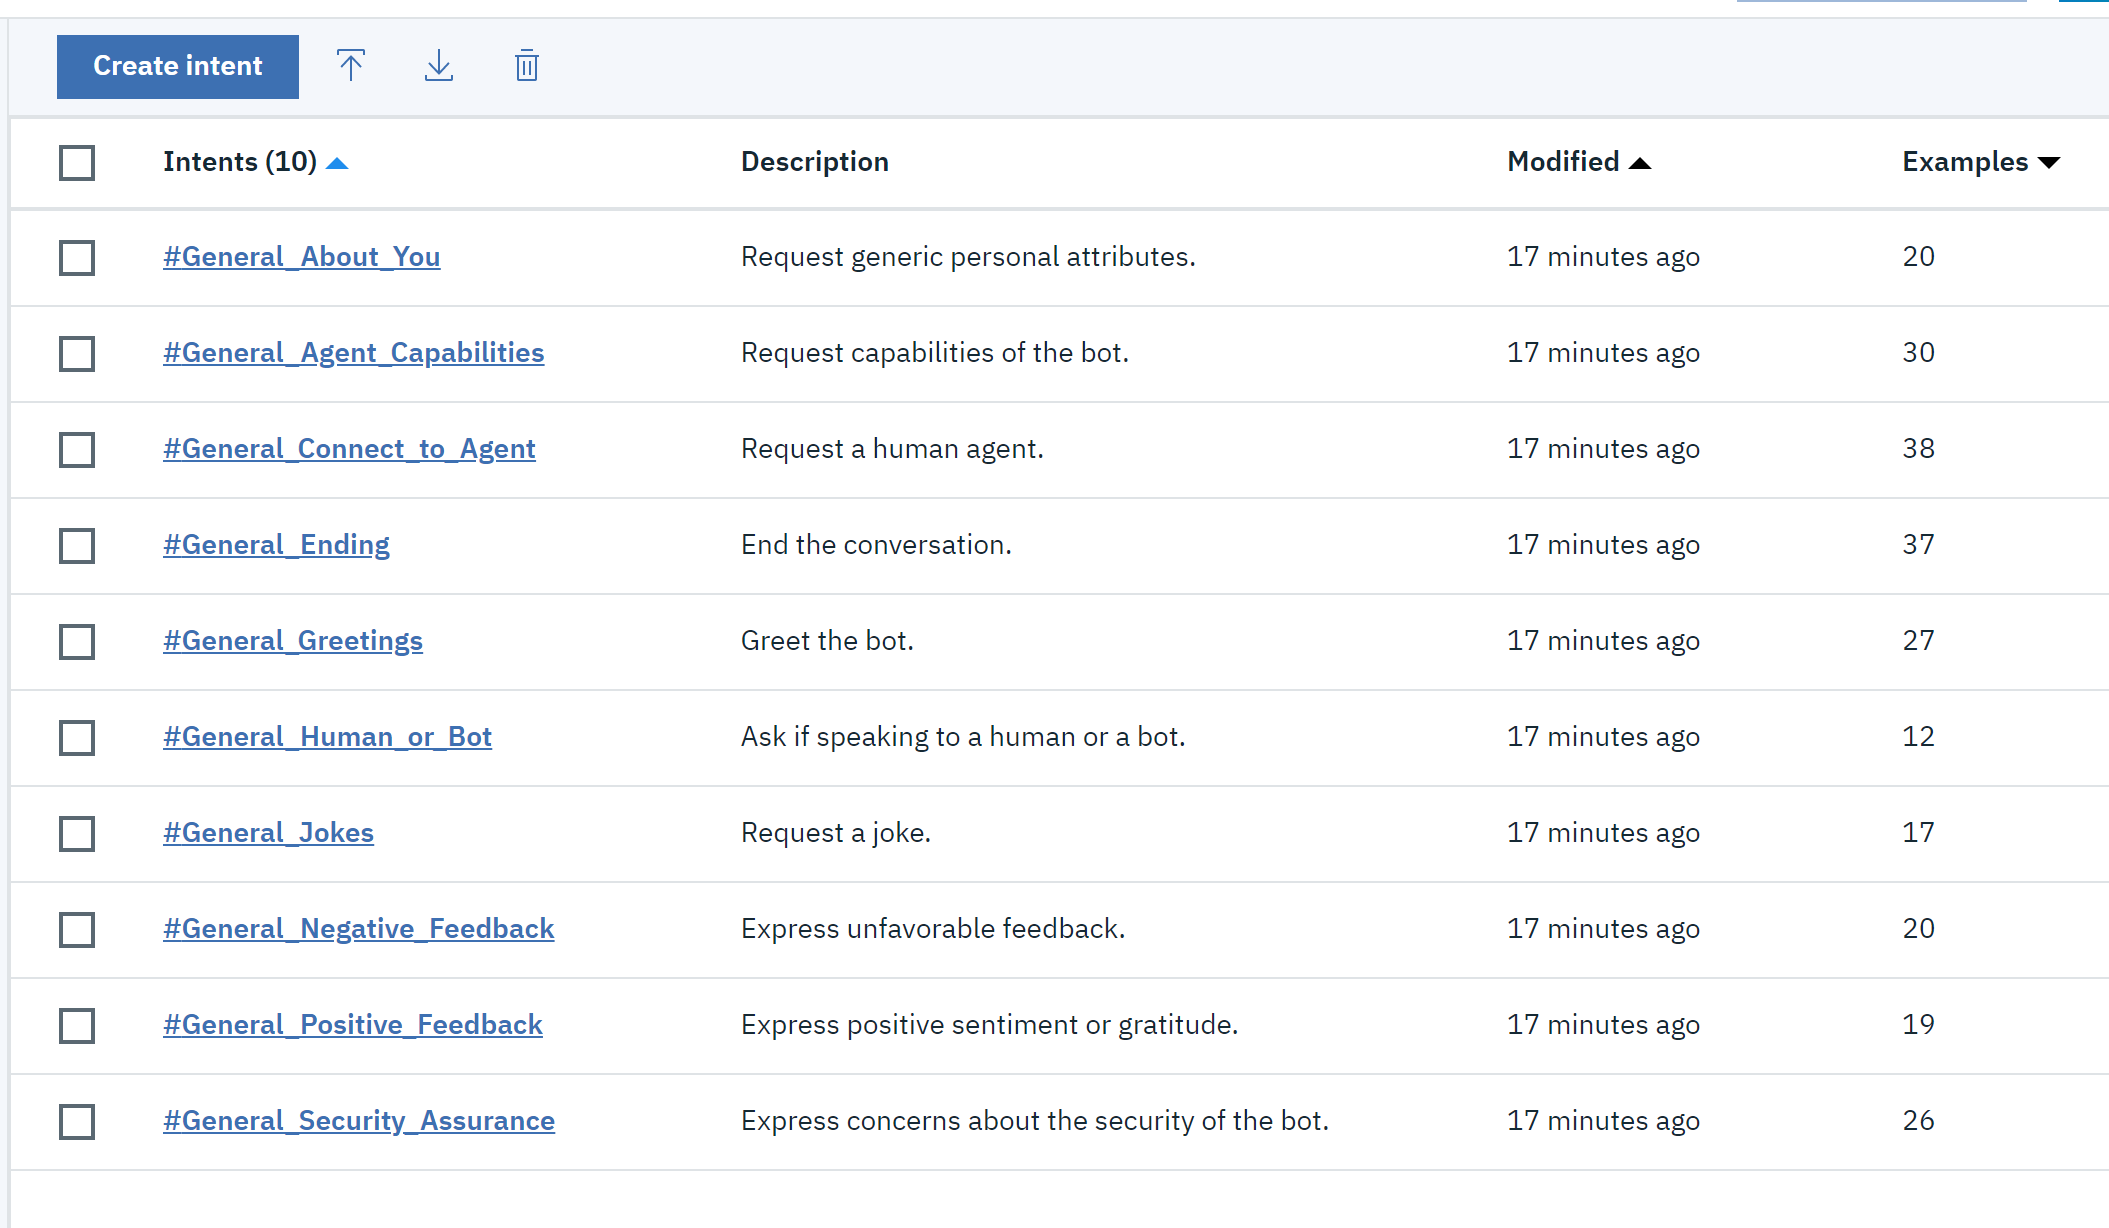
After clicking Add to skill and going to the Intents tab on the left side of the window, we will see that all intentions from the catalog have been added there:
To better understand what is going on here, let's go to one of them.
For example, after entering General_Jokes intentions, we will notice that there are phrases listed there that can lead us on the topic of telling jokes.
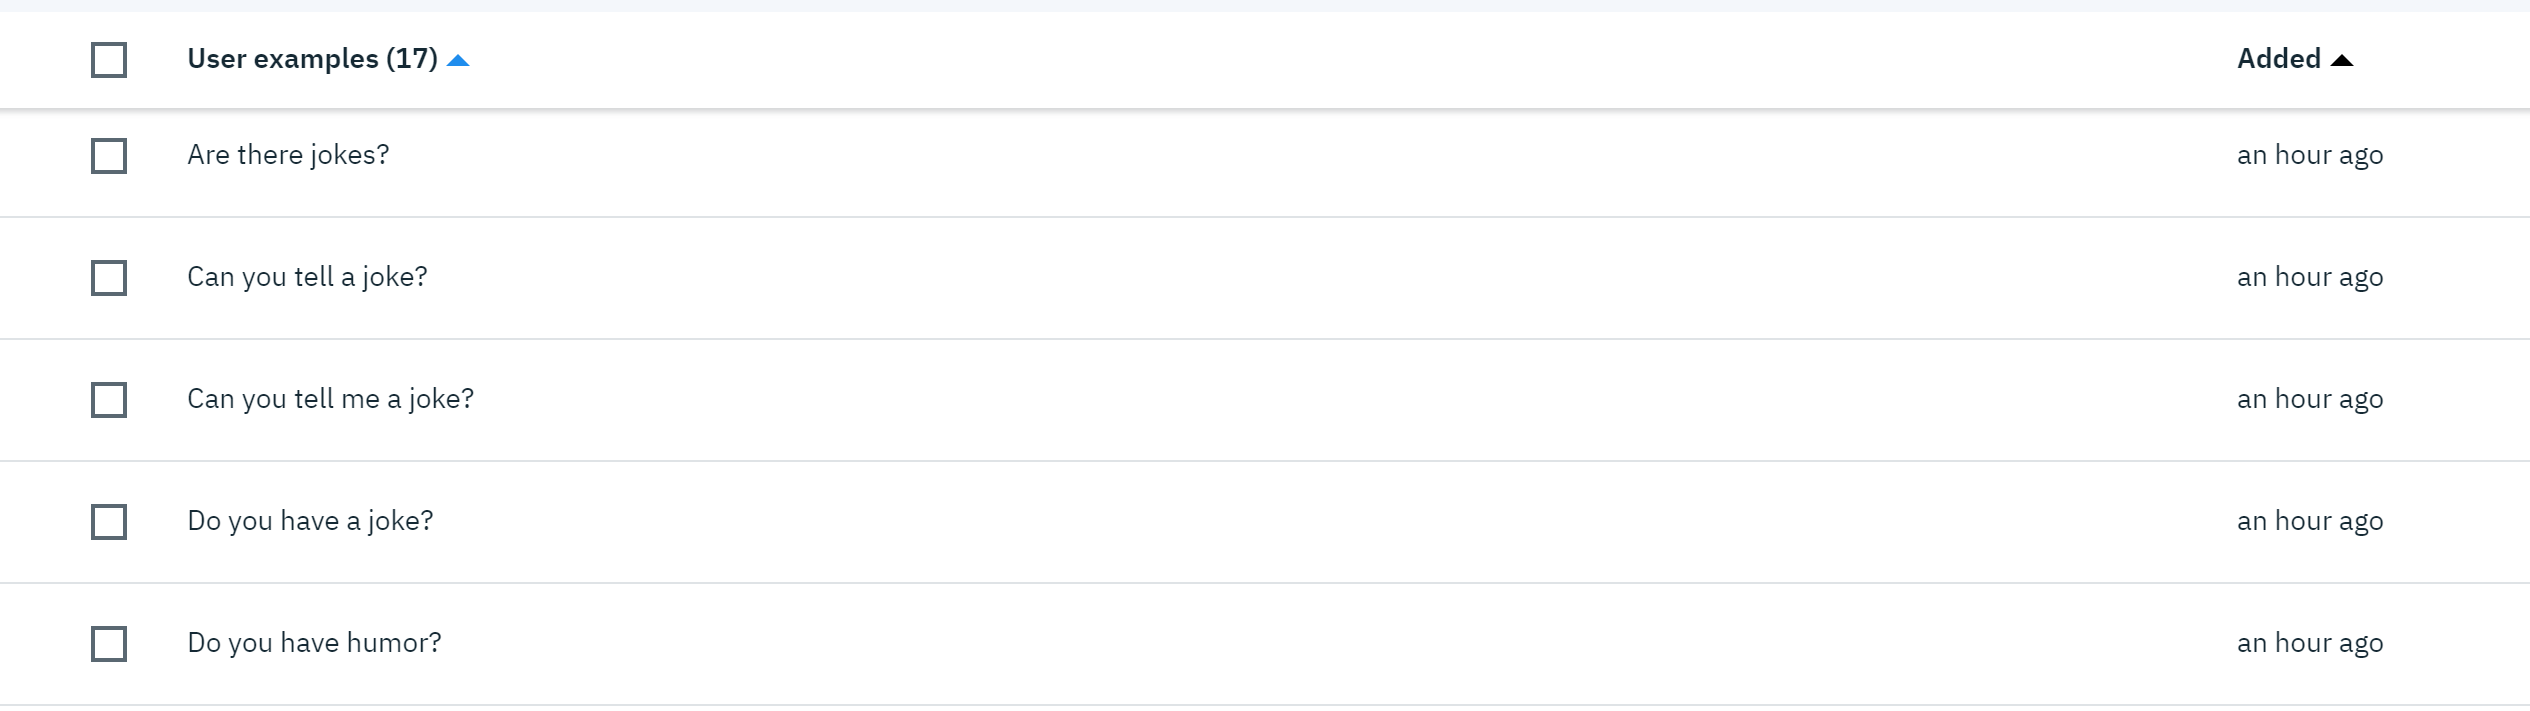
We can also add your additional returns above.
Now, with imported intentions, let's try to make a dialogue.
Click the Dialog tab on the left. A visual dialog editor will appear.
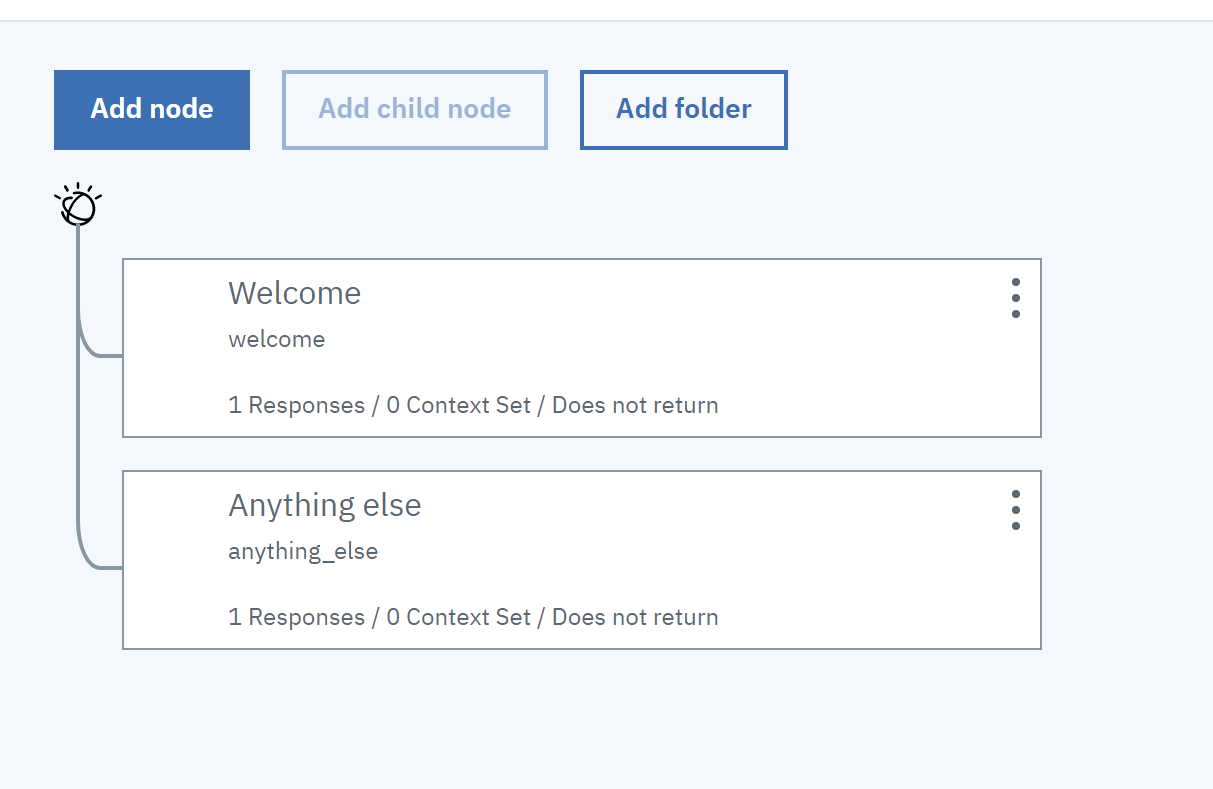
The initial dialogue is simple - we can say hello - if what the user writes does not fall into the "Welcome" category, that is, the algorithm will run the anything_else node or the request to repeat the question due to misunderstanding. This node should always be at the end.
Welcome is not the same as the #welcome intention we saw earlier. Welcome is always started at the beginning of the conversation.
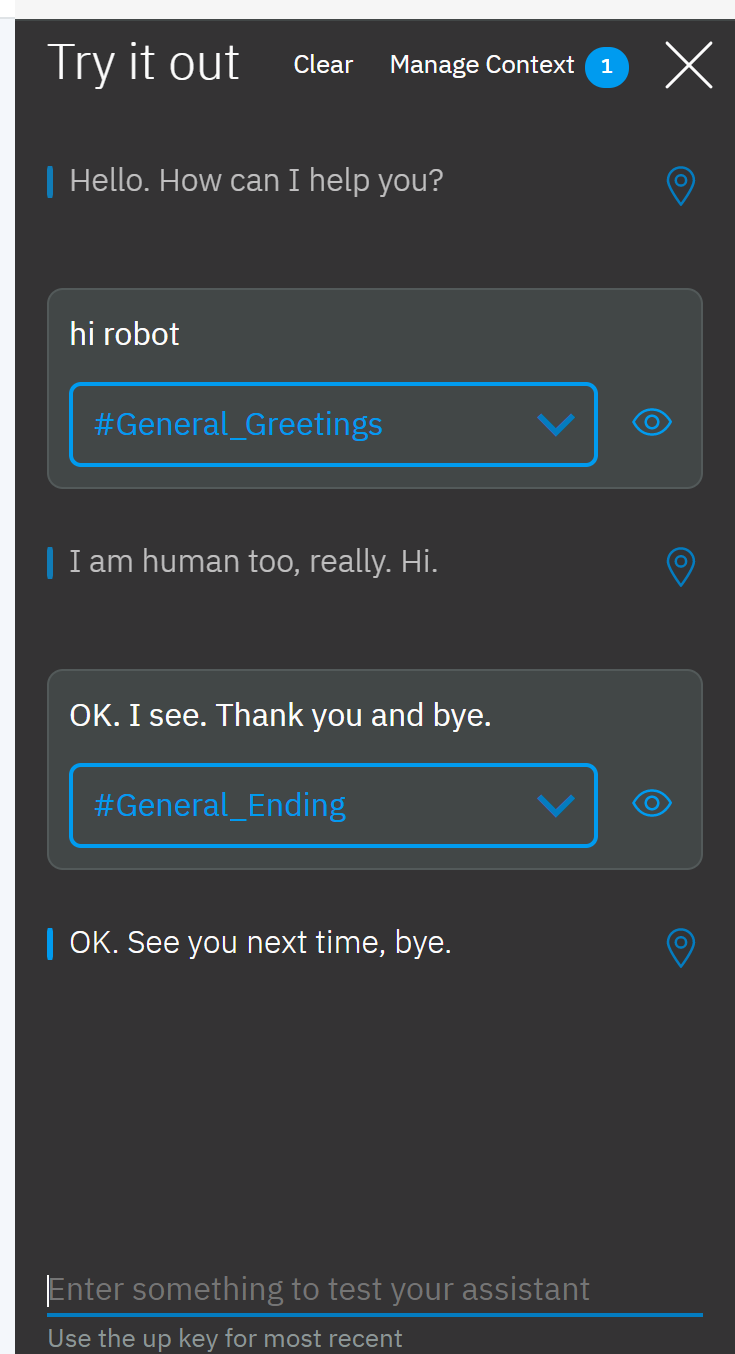
In fact, even an simply organized assistant can be started, which we can try right away on the page by clicking the Try it button!
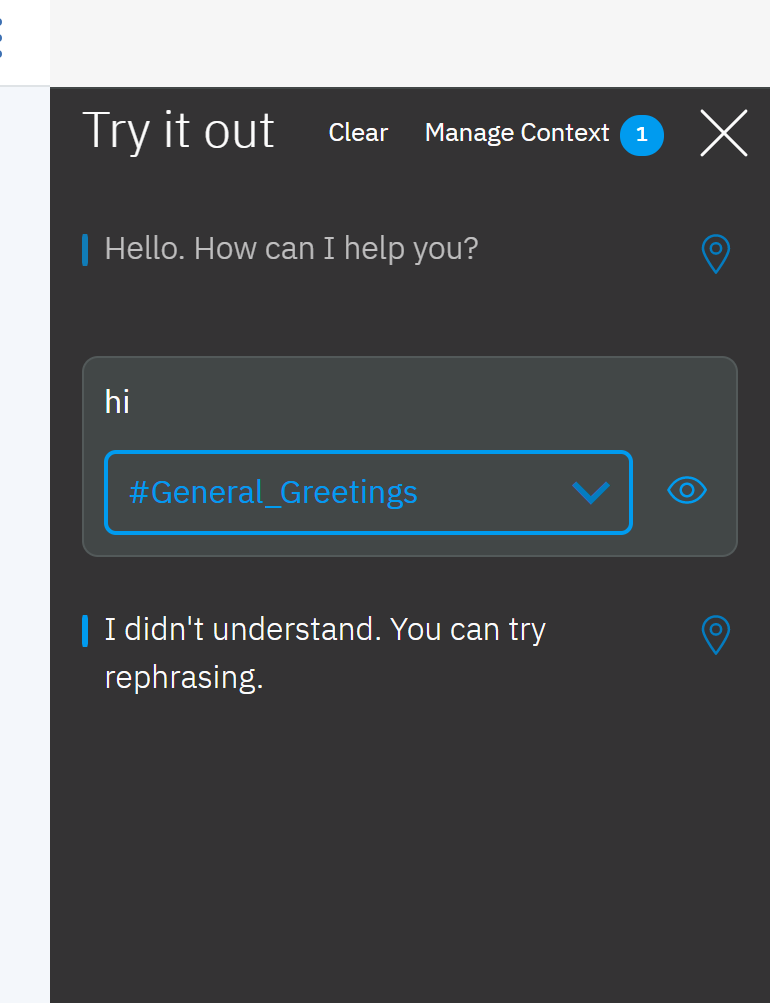
We see that our statement ("hi") has been classified as General Greetings - general greetings, but we have not added the node with this intention and the assistant responded in accordance with the algorithm asking to repeat the query. Let's fix it.
Click the menu button (...) on the welcome node.
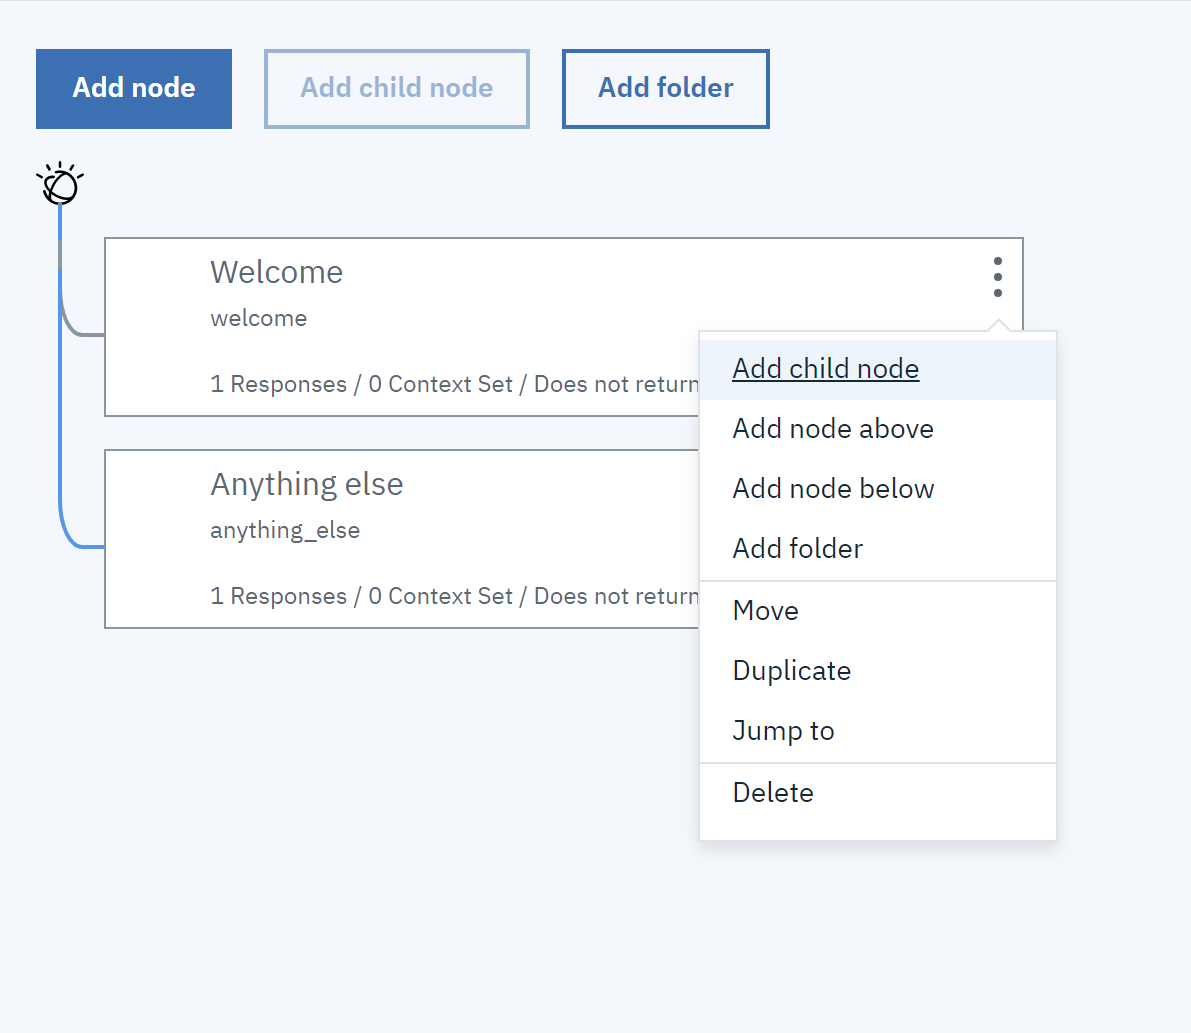
Let's choose "Add node below". We fill in to set a few responses (any), for greeting.
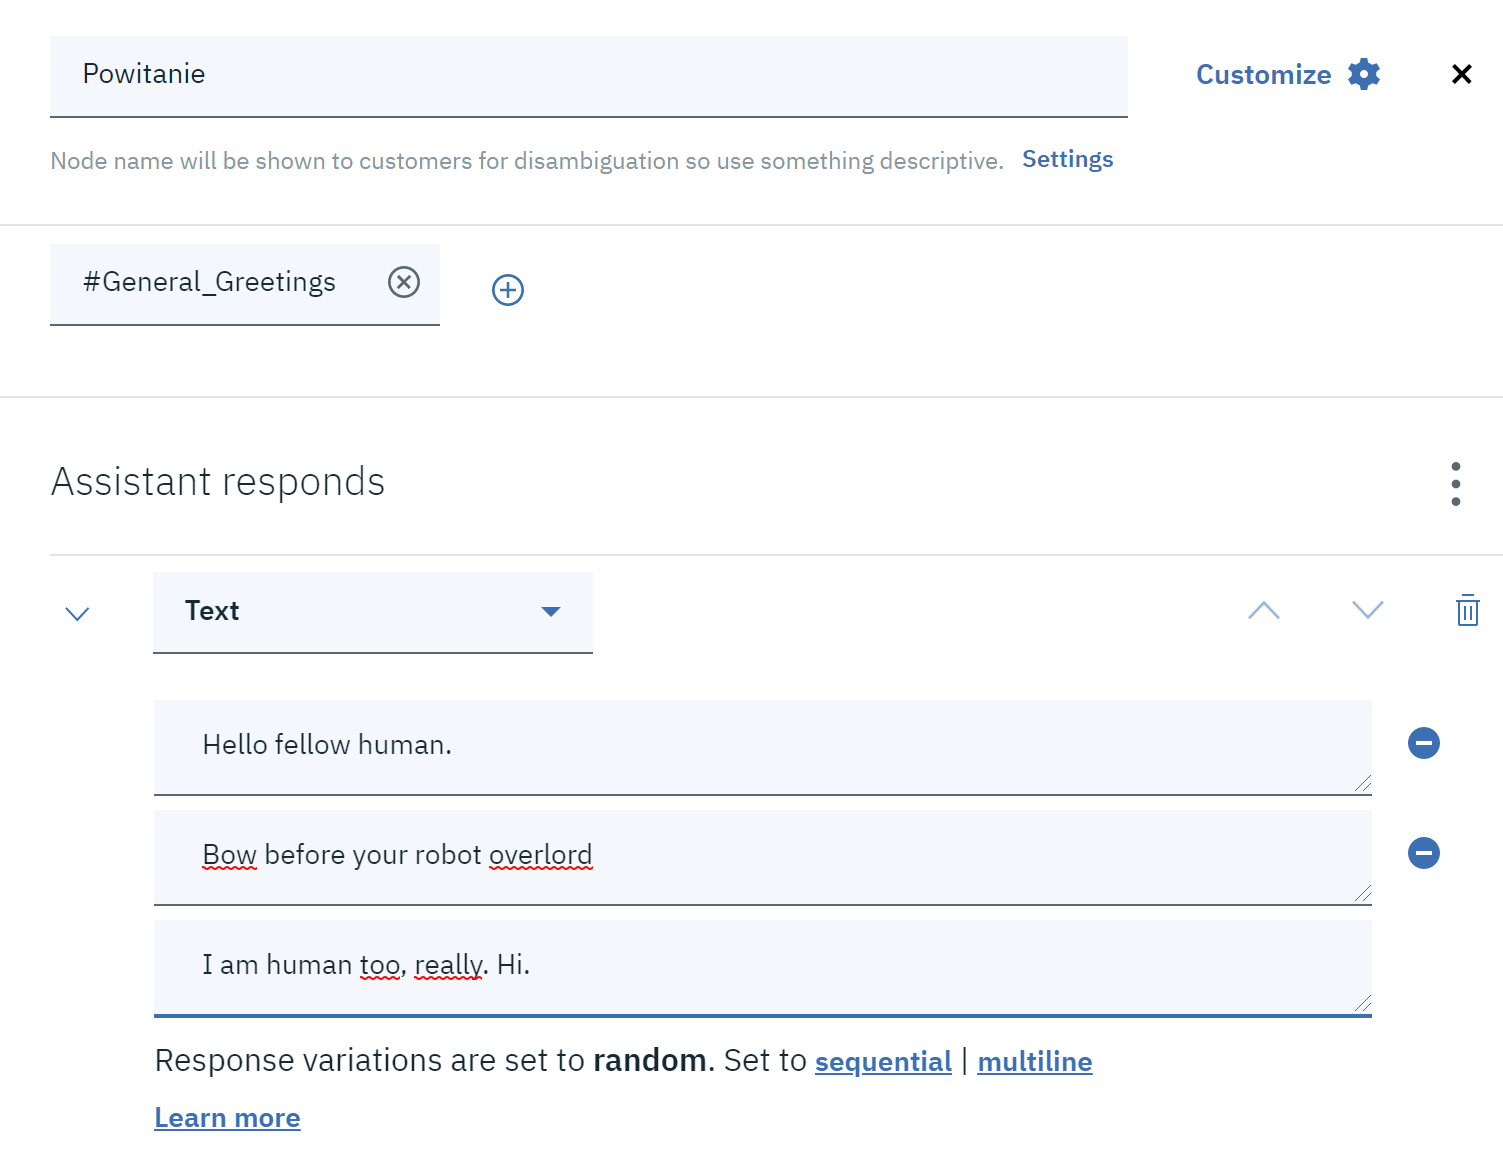
Then add the ending to this short chat. On the newly added node, click the menu and select Add node below again .
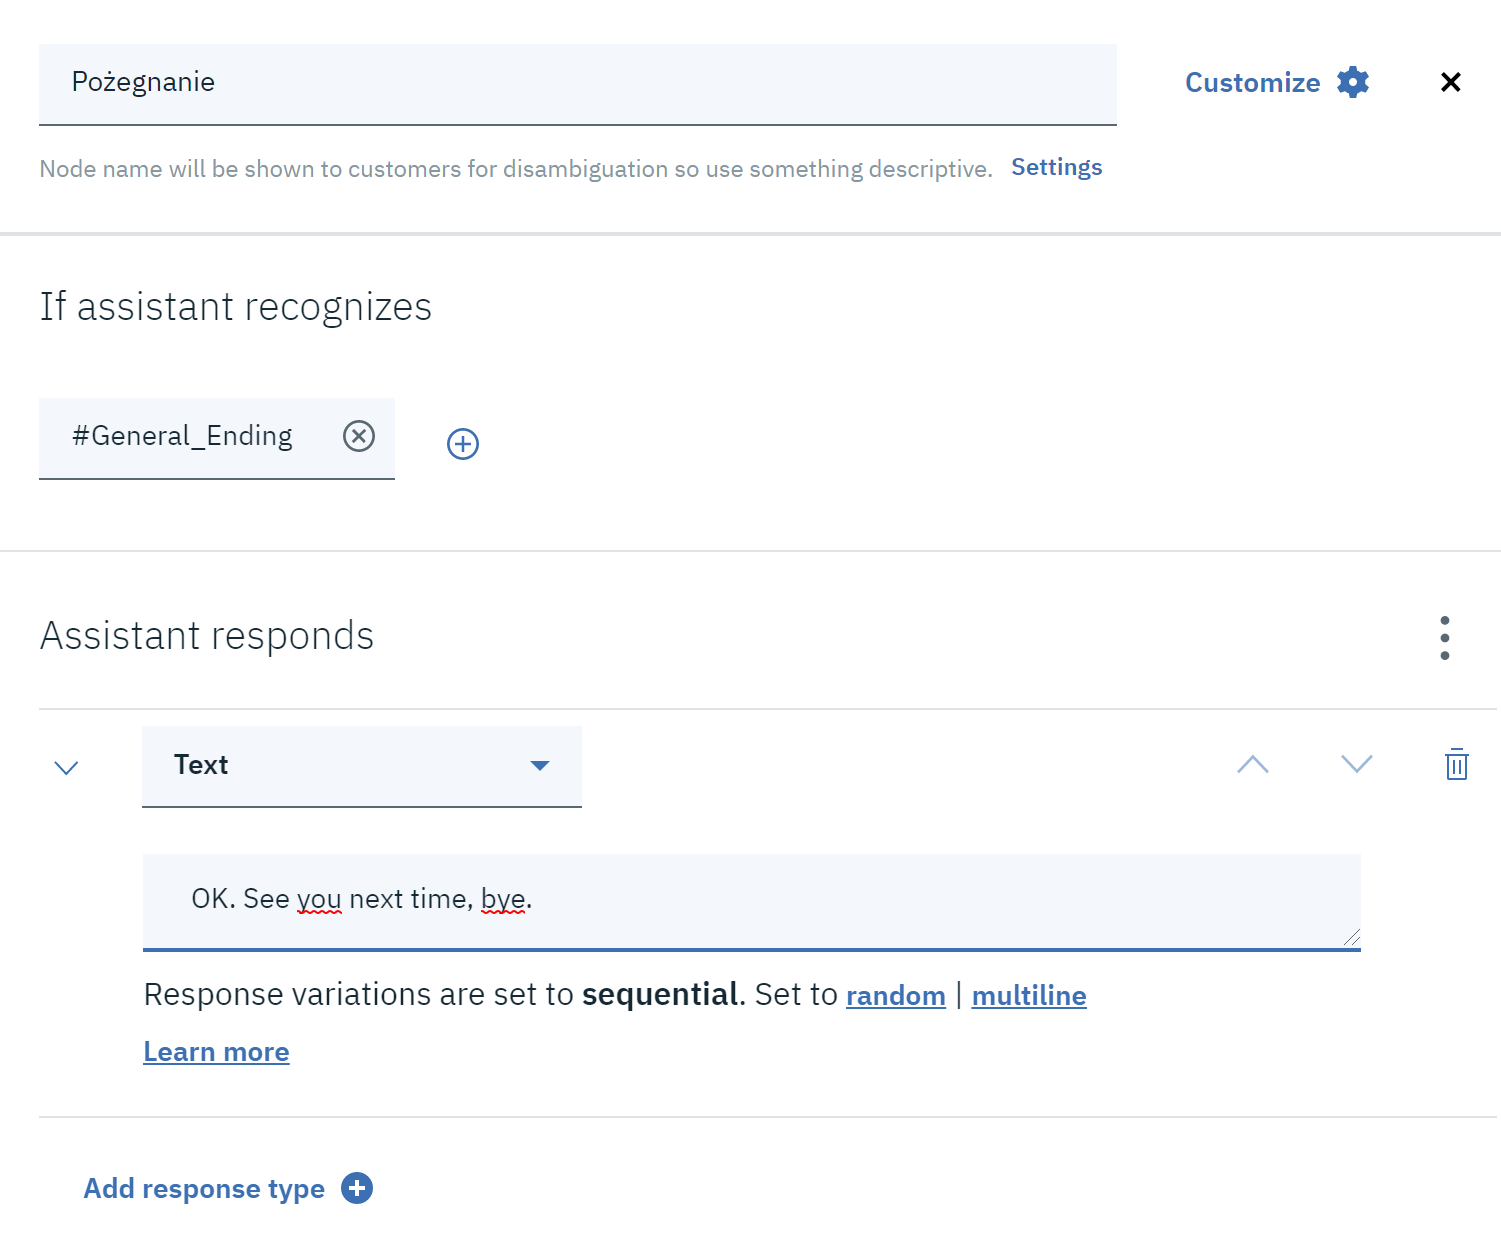
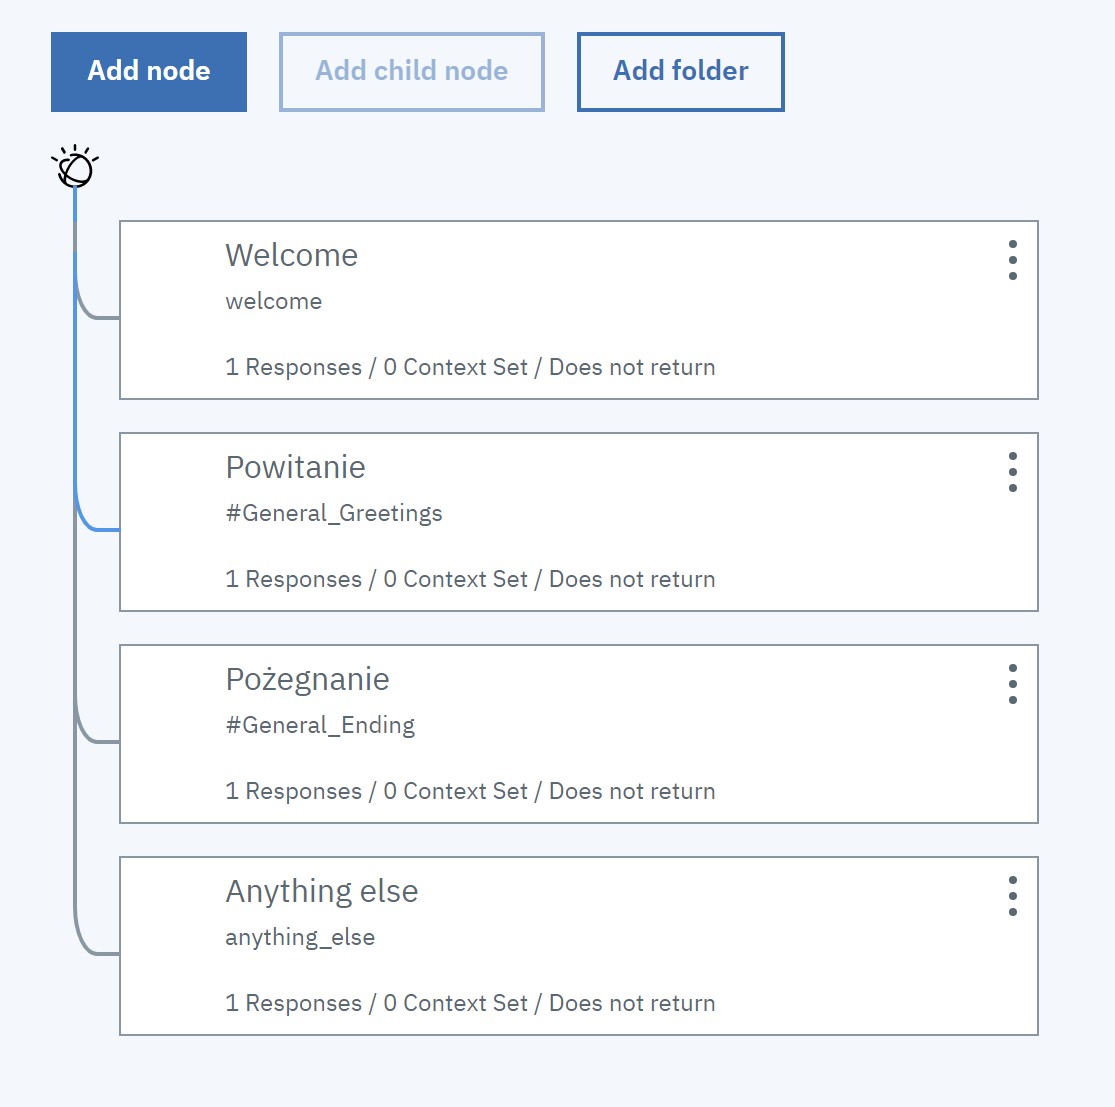
Our dialog should look something like this:
Now we can click Try it again and have a more meaningful conversation:
What would such an assistant be if he lived only in our development console? Let's try to integrate it with some existing dialogue system.
Let's return to the page with our assistant, and click " Add integration ":
As we can see, there are several predefined integrations to choose from:
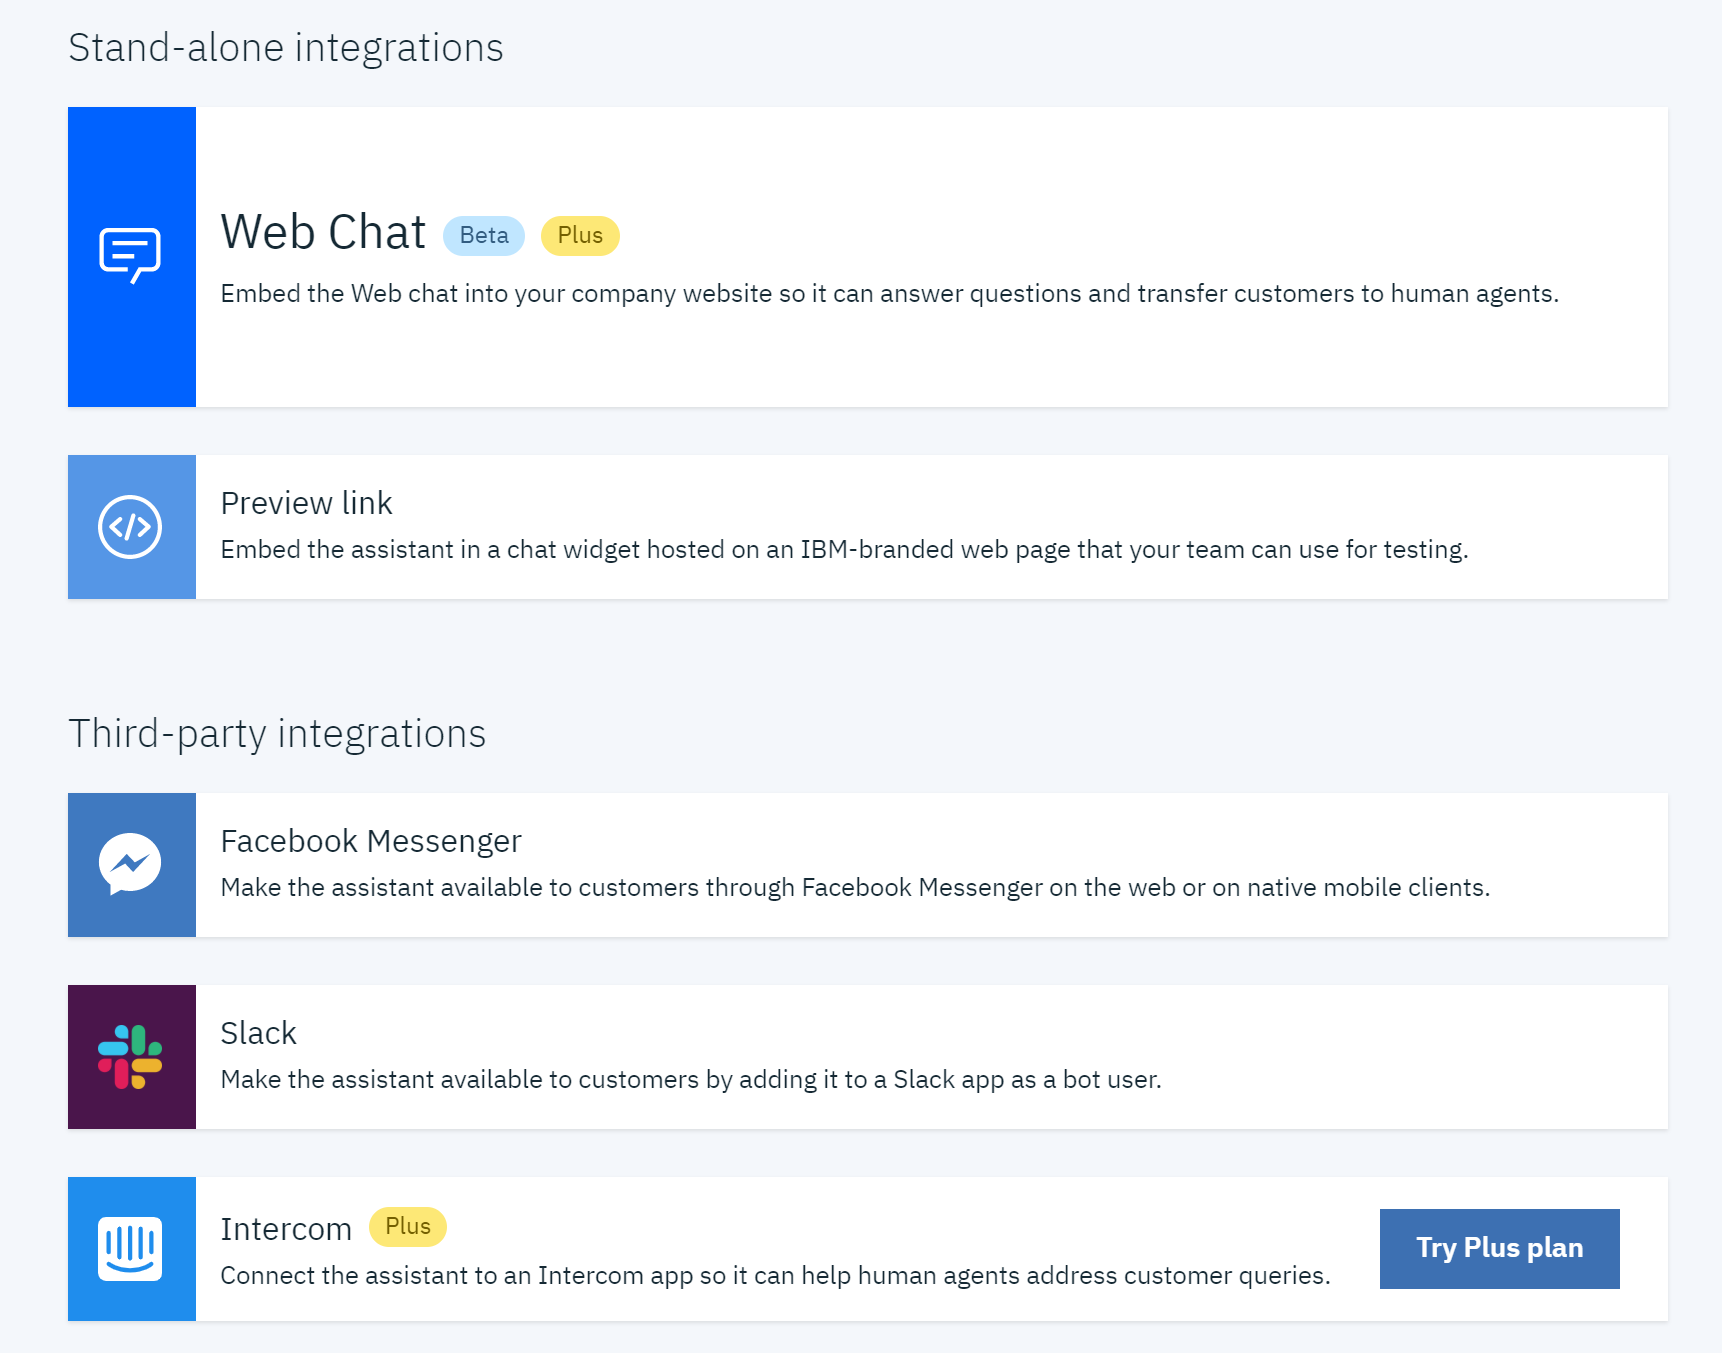
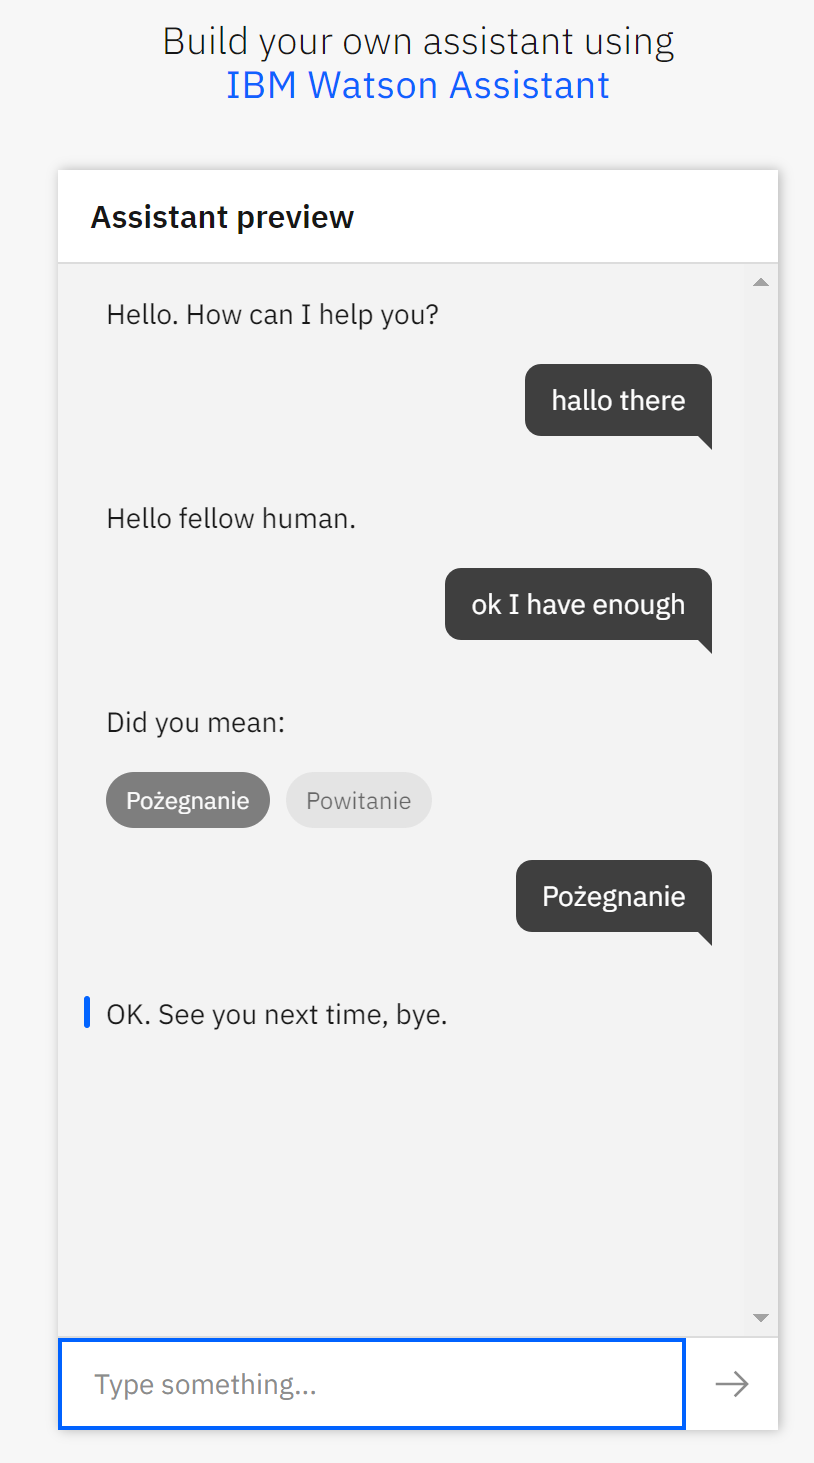
We can use the preview link, which will allow us to pass the URL to our assistant, e.g. for testing.
During tests, the assistant can also learn by asking us a question when he is not sure of our intention:
The possibilities of expanding such an assistant are endless. Even without writing any line of code, we are able to add to it simple decision-making processes, suggestions, asking for necessary details and even integration with external data sources.
Thanks to IBM Cloud and Watson Assistant, we are able to achieve what we once needed a team of programmers, a designed database and a trained artificial neural network. For this we have done all this based on the free version of the service.
To have fun building your chat assistants yourself, you can sign up here .
* The material was created in cooperation with IBM.
We create a chatbot without coding with the help of Watson Assistant


Comments
Post a Comment